HAT PATCH MEASURING GUIDE
Not all patches will fit all cap styles.
Please note these guidelines to ensure that your patch will fit properly.
TIP: To ensure that your patch will fit without issues, our proofs are sent to size.
Please print, cut out and affix the proof to your hat.
STEP 1: Find the Curvature Break Line (the point where the top of the hat begins to
curve). This is the maximum point for the top of the patch.

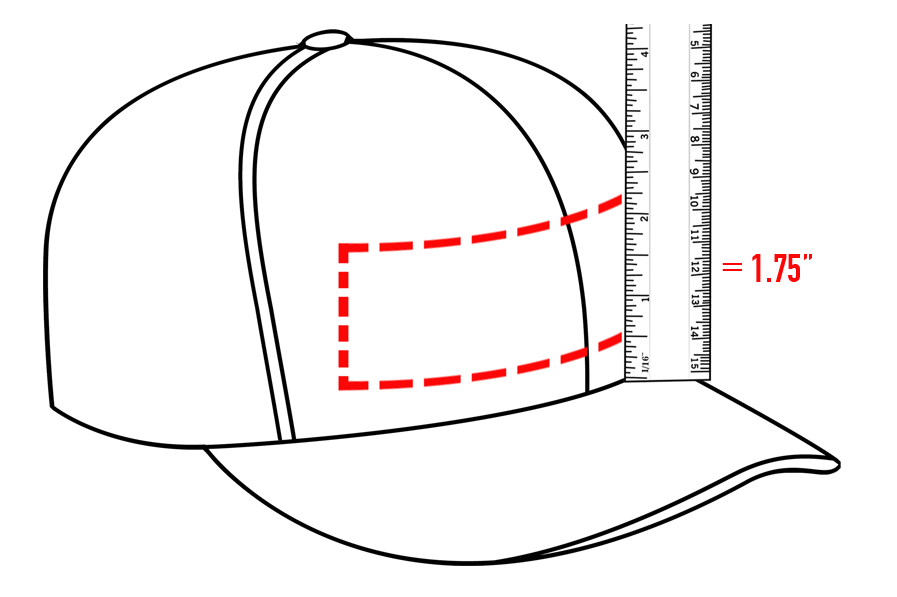
STEP 2: Find the Brim Line (the point where the brim meets the hat).
Minimum distance from brim for stitched on patches: 1/2”
Minimum distance from brim for heat seal patches: 0” (1/4” will be more aesthetically pleasing).

STEP 3: Subtract the Brim Line distance from the overall distance from the Brim Line to
the Curvature Break Line to find your maximum patch height.
What could possibly go wrong?
STITCHED ON PATCH
An over-sized patch can cause many problems on an embroidery machine. Binding, shifting of the patch and poor stitching can be the result.
HEAT SEAL PATCH
Oversized patches for heat seal applications typically result in creasing, corners curling up or the patch shifting so that it rests on the brim.